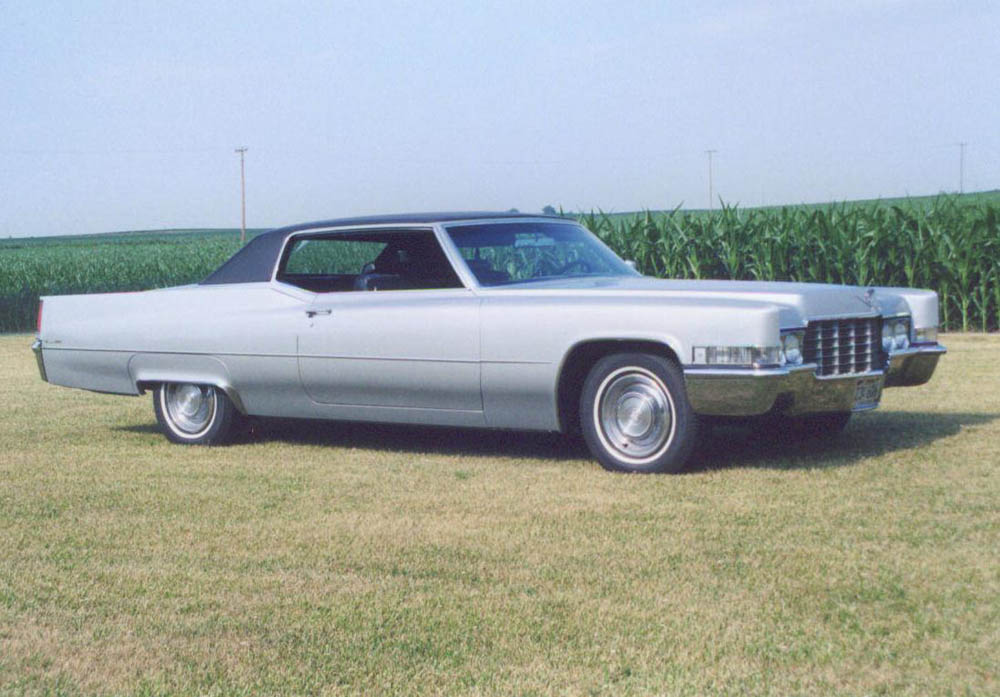
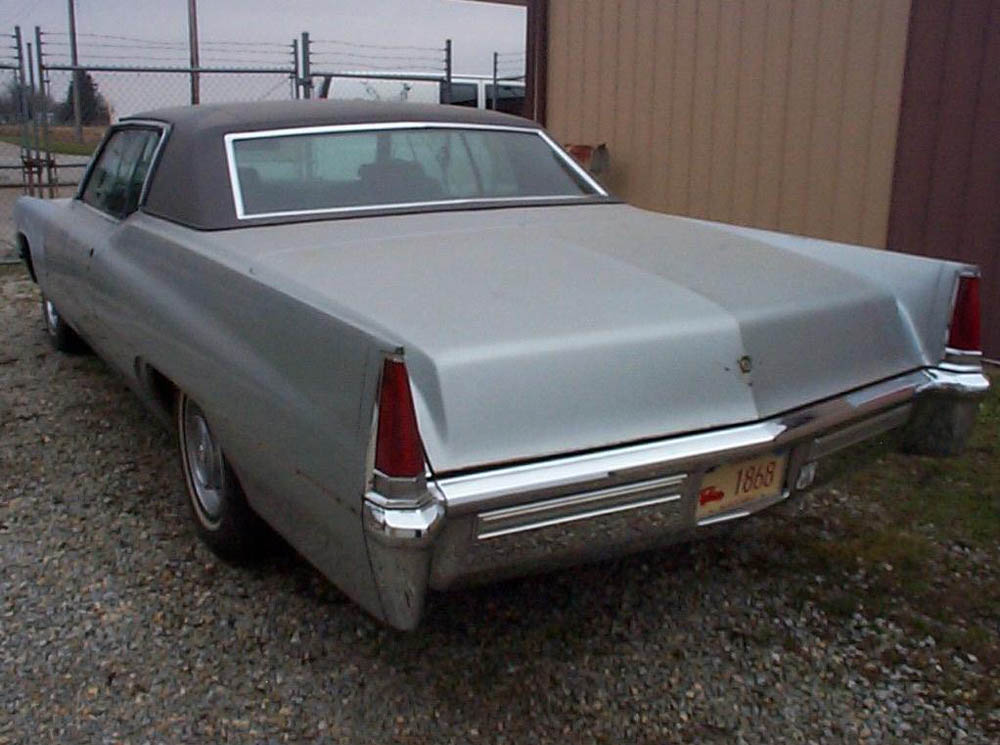
1969 Cadillac Coupe de VilleSold in July 2010 after eleven years in the collection |
|
 |
|
Jim's restoration of a 1969 Cadillac Coupe de Ville is documented in photos with captions on this page. Click the photos for an expanded view of each. |
|
See a video of Jim's 1969 Cadillac. Click on the youtube video link below. NOTE: To see the video in high resolution and/or full screen. First start the video. Once the movie starts, click the icon (HQ) at the lower right of the screen. This will switch the movie to High Quality. To the right of the HQ button is the "FULL SCREEN" icon. |
|
In the USA in the year 1969 Entertainment: The number one movie was Midnight Cowboy, followed by Butch Cassidy and the Sundance Kid, The Wild Bunch, and Easy Rider. Oliver won the academy award for Best picture. Record of the Year: "Mrs. Robinson," by Simon and Garfunkel. Album of the Year: By the Time I Get to Phoenix, Glen Campbell. More than half a million people gather in the small, upstate New York town of Bethel (near Woodstock, N.Y.) for four days of rain, sex, drugs and rock 'n' roll. Mission Impossible, Hogan's Heroes, and Rowan and Martin's Laugh-In were popular on the TV set. In the news: Neil Armstrong and Buzz Aldrin become the first humans to walk on the moon. The FCC bans all cigarette advertising on television and radio. The Manson Family commited the "Sharon Tate murders" that changed America. After 148 years, the Saturday Evening Post ceased publication. The Boeing 747 "jumbo-jet" makes it's first commercial flight. The Concord Supersonic-Transport makes it's first Trans-USA flight, Seattle to New York. Politics: Richard M. Nixon is inaugurated as the 37th President. In 1969 the first draft lottery is held and in Washington, DC, 250,000-500,000 protesters stage a peaceful demonstration against the draft and the Vietnam war, including a symbolic "March Against Death". Sports: UCLA defeats PURDUE (92-72) in the NCAA Championship. In Nascar, Bobby Isaac debuts the first of the super-speedway special bodied "winged cars" and won 17 of the 50 races entered. Isaac is driving the bright red K&K Insurance sponsored 1969 Dodge Charger Daytona, and is the most popular driver. USA cost of living: Gasoline was selling for about $0.35 per U.S. Gallon. The median USA household income was $8,386.00. The cost of a first class stamp was $0.06. In the courts: Sen. Edward M. Kennedy pleads guilty to leaving the scene of a fatal accident at Chapaquiddick, Mass. in which Mary Jo Kopechne was drowned. Kennedy gets a two-month suspended sentence. The U.S Supreme court outlaws segregation in the South. |
|
|
1969 Cadillac Coupe De Ville. 66,000 actual miles (106,200km). 472 CID engine (7.7 liter), TH400 automatic transmission, Positraction rear differential. Purchased in 1999 from an estate in Bedford Indiana. The car was not driven from 1988 until 1999. Jim has the original window sticker and related service documents to day one. This car had 90% original paint, and was garaged it's entire life. The factory silver laquer was weak, and the typical front fender rust had been previously repaired. |
The car had been sitting in the original owner's garage for so long, the seals in the carburetor and automatic transmission had "dryed out". Buzz Briggs at The Autotorium in Lafayette Indiana rebuilt the TH400 transmission, and the carburetor. Front suspension bushings were replaced due to dry rot. ----------------------------------------------- Jim's Cadillac, October 6th 2007 Newport Indiana antique auto hill climb and auto show.. |
 |
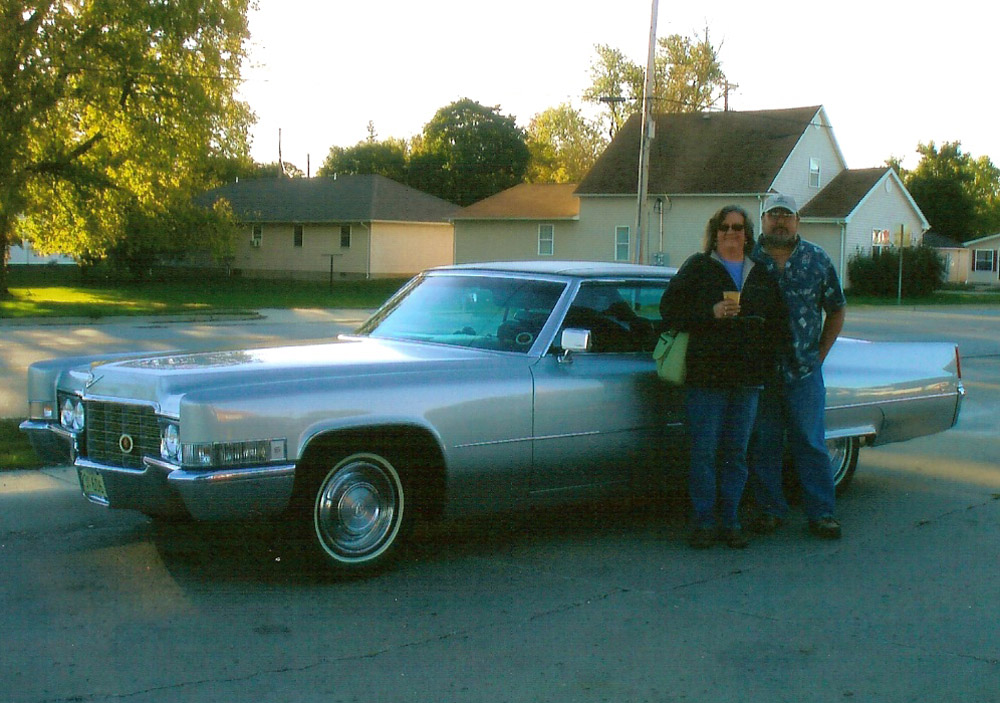 |
October 13 2007, Fox Ridge Illinois fun-run. |
Fowler Indiana Theater web site Prairie Preservation Guild information Theater history including more photos A true small town America volunteerism success story! |
 |
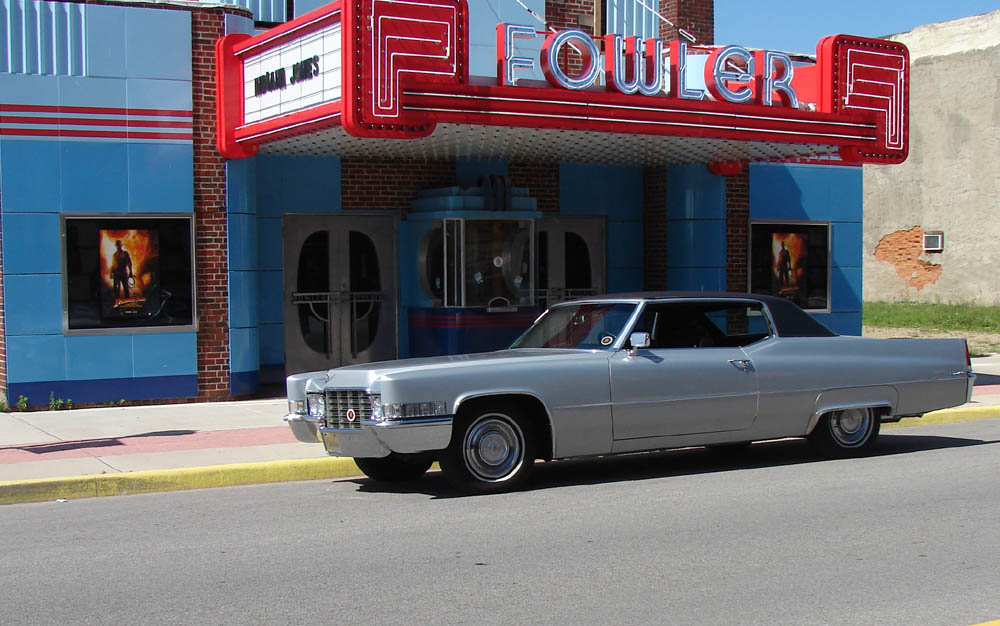 |
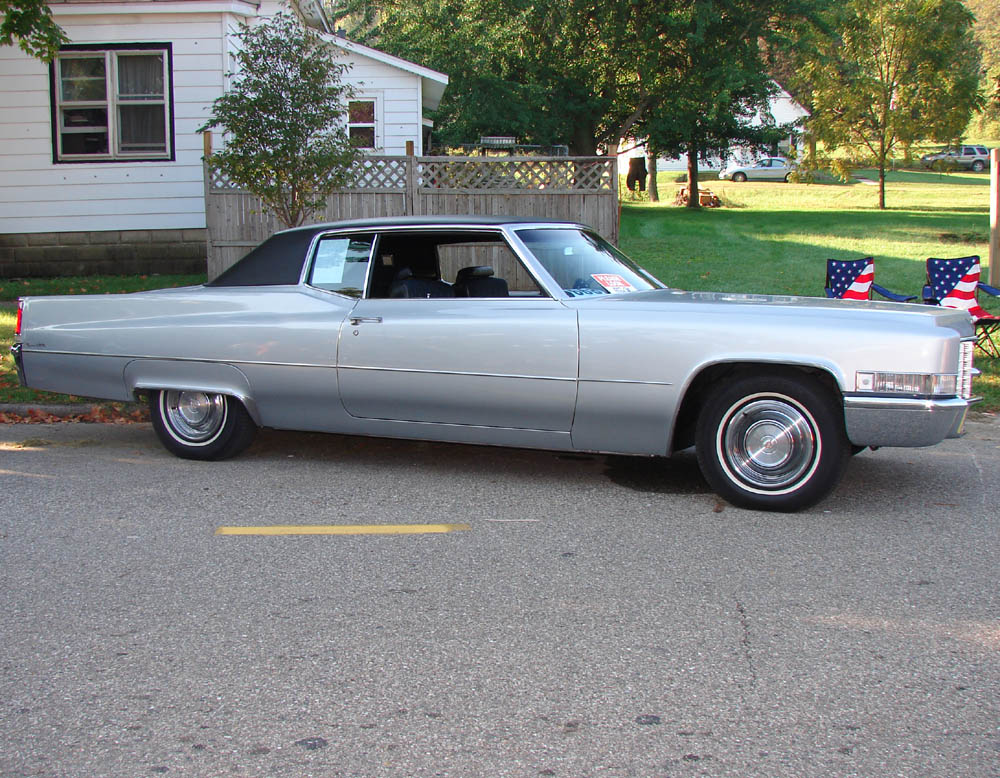
June 14th 2008. Photo taken in front of the historic Fowler Theater. An example of Art Moderne architecture. Constructed in 1940. With assitance from the Indiana Historic Landmarks Foundation and a dedicated group of volunteers from The Prairie Preservation Guild, a complete restoration is almost finished. A local and national historic treasure, near sell-out crowds attend weekend showings of first-run movies. |
Newport Hill Climb auto show 04 October 2008 |
 |
 |
Newport Hill Climb auto show 04 October 2008 |
----------------------------------------------------------------------------------------------- |
|
The Restoration |
|
In the 1969, and 1970 model years, a design flaw allowed
rain water draining from the windshield cowl area to fall directly into
a thin cavity between the rear lower fender and the inner reinforcement
panel. This cavity would soon fill with leaf debris, and road dust silt.
The area would then not drain properly, and retain moisture in the debris.
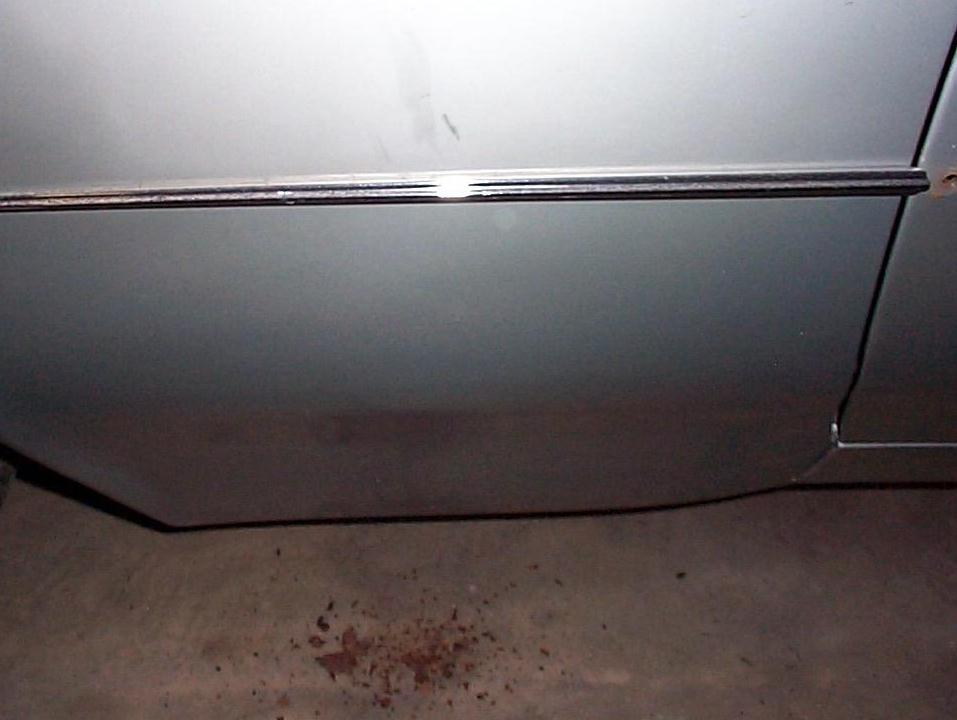
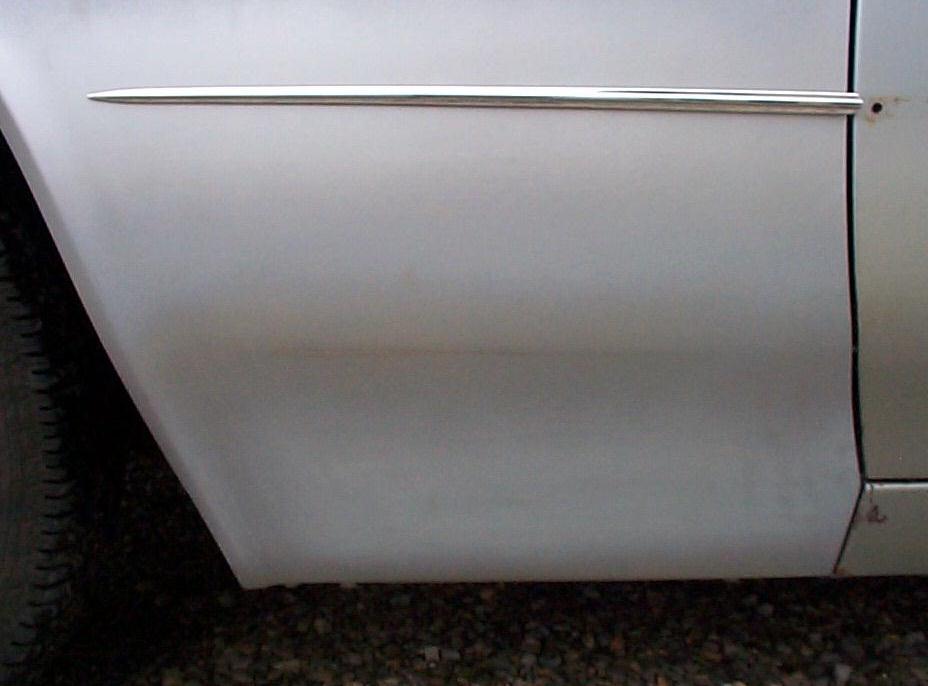
Almost all Cadillacs of this era have rust in this area. The front fenders
had been repaired previously. There was no rust anywhere on the car except
these two areas. The front fenders were removed to properly address the
repair. As no quality patch panels were available, they were fabricated. |
 |
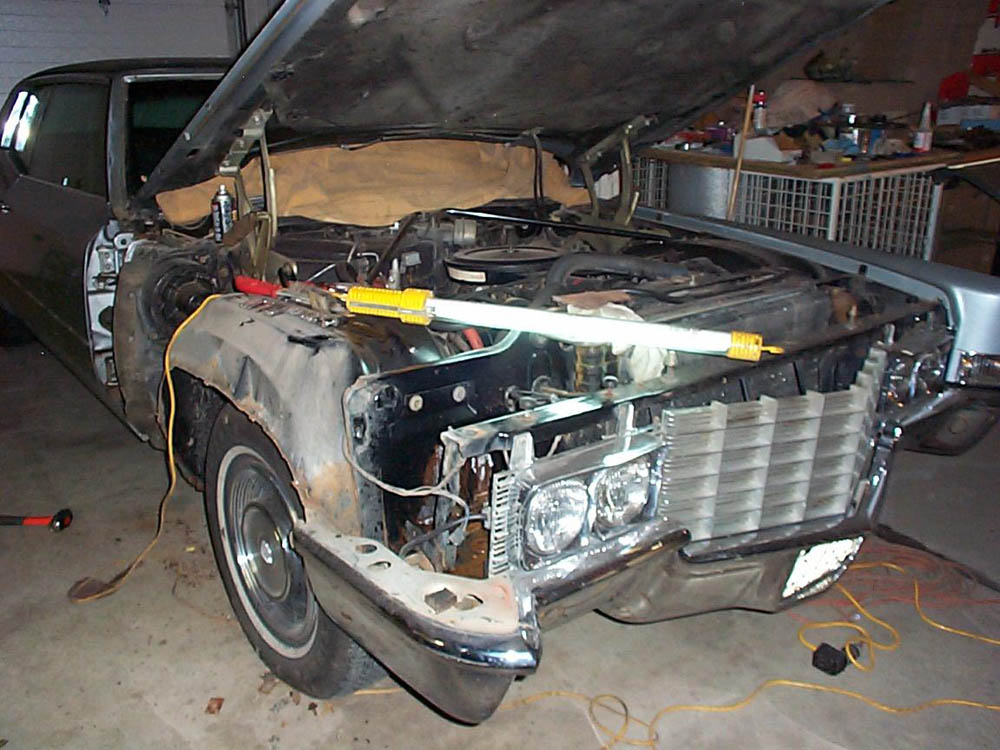 |
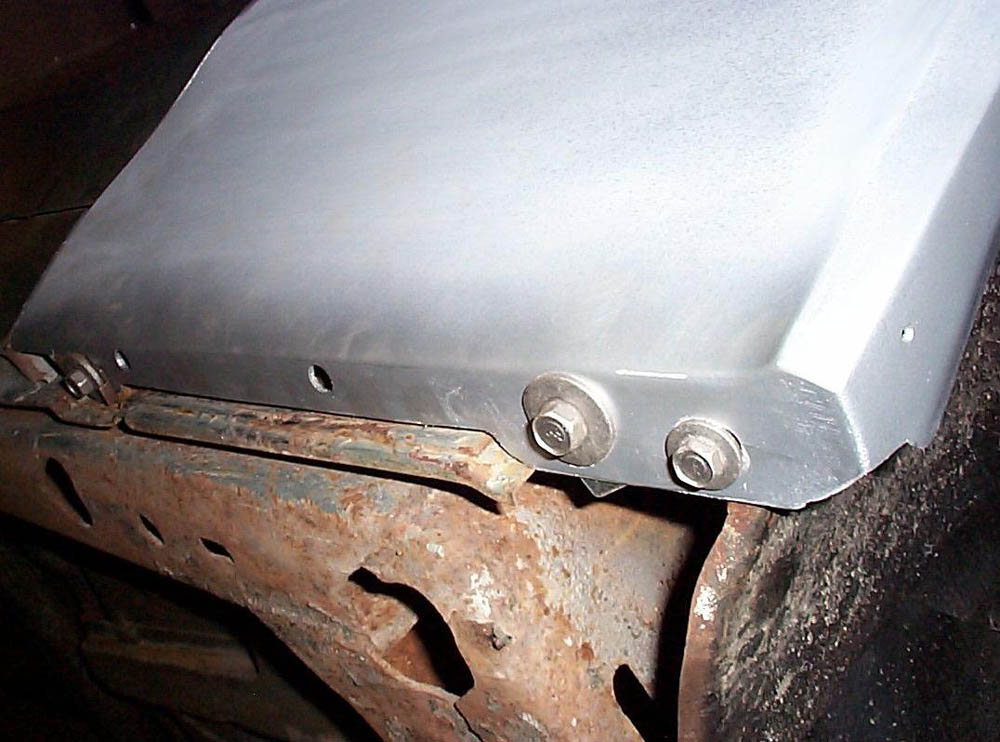
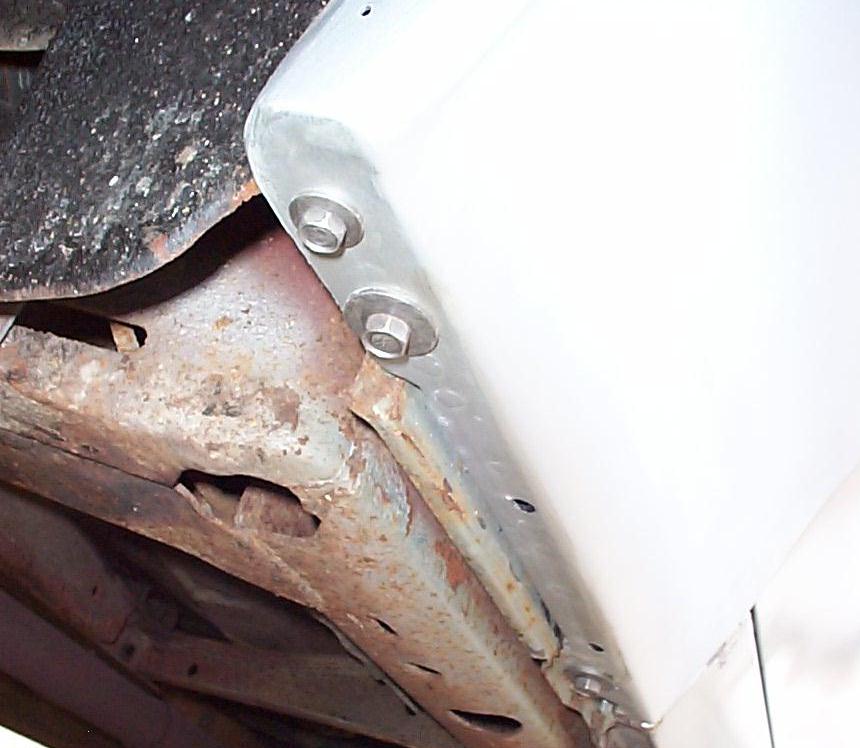
While the fender was removed, it was a good time to
restore the battery box area. At the same time, the door hinges were removed
one at a time, and the original plastic bushings were replaced with bronze
alloy ones. This corrected door sag that is typical on large two door
autos. Removing one hinge at a time reduced the labor involved, and disconnection
of the door wiring loom was not necessary. On this Cadillac design, the
fenders are non-load bearing. The hood hinges, and related inner structures
are not structurally supported by, or directly attached to the outer fender
skin. If the attaching hardware is not too rusty, the fender can
be removed in about 45 minutes. |
The battery box was in remarkable condition with minor
surface rust. It was treated with naval jelly and painted with rust inhibiting
paint, then rubberized undercoat. |
 |
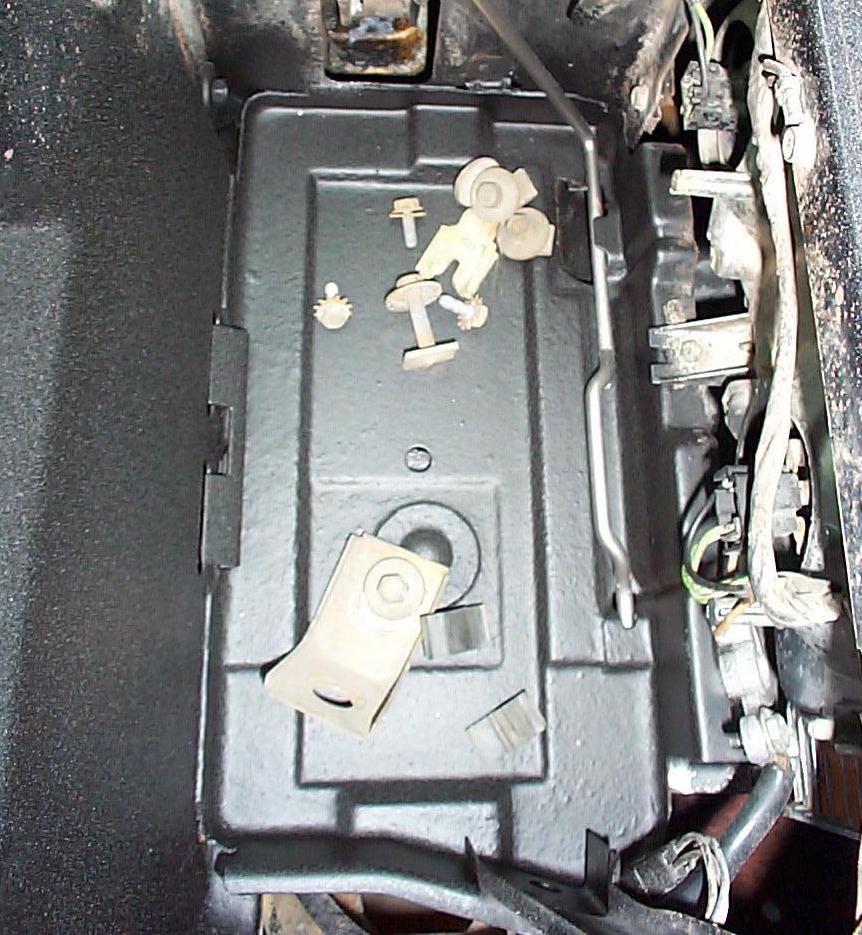 |
Final battery box restoration. |
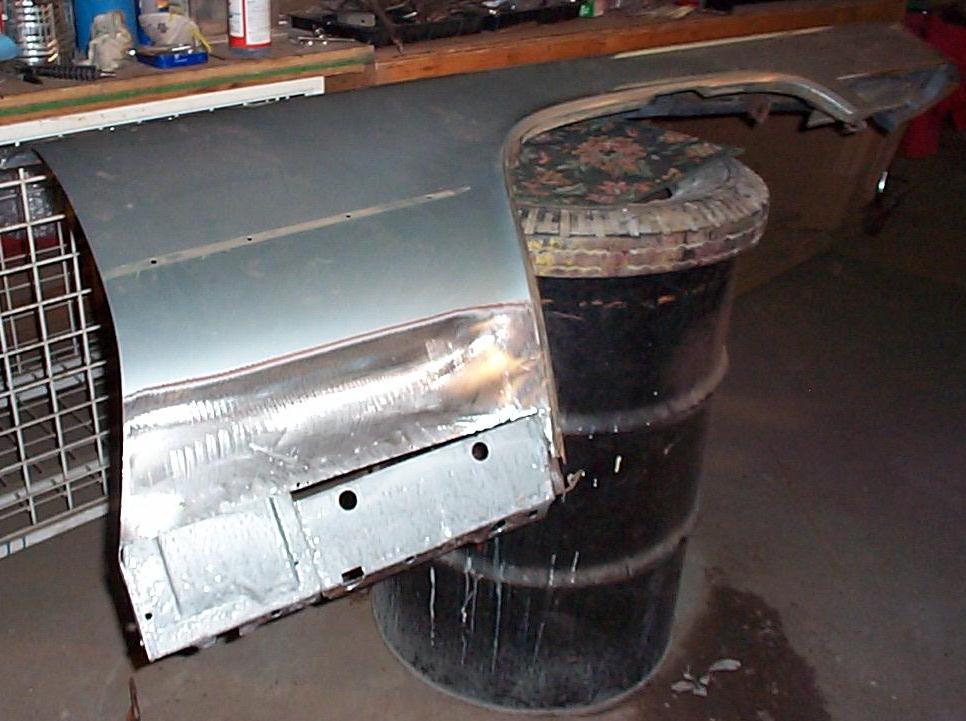
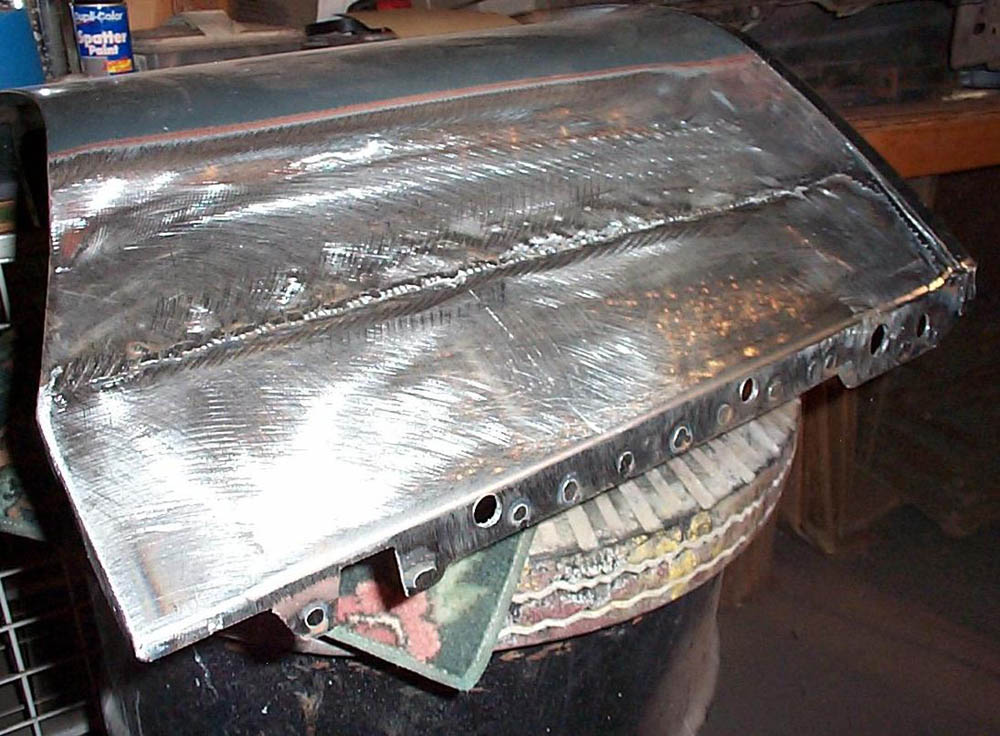
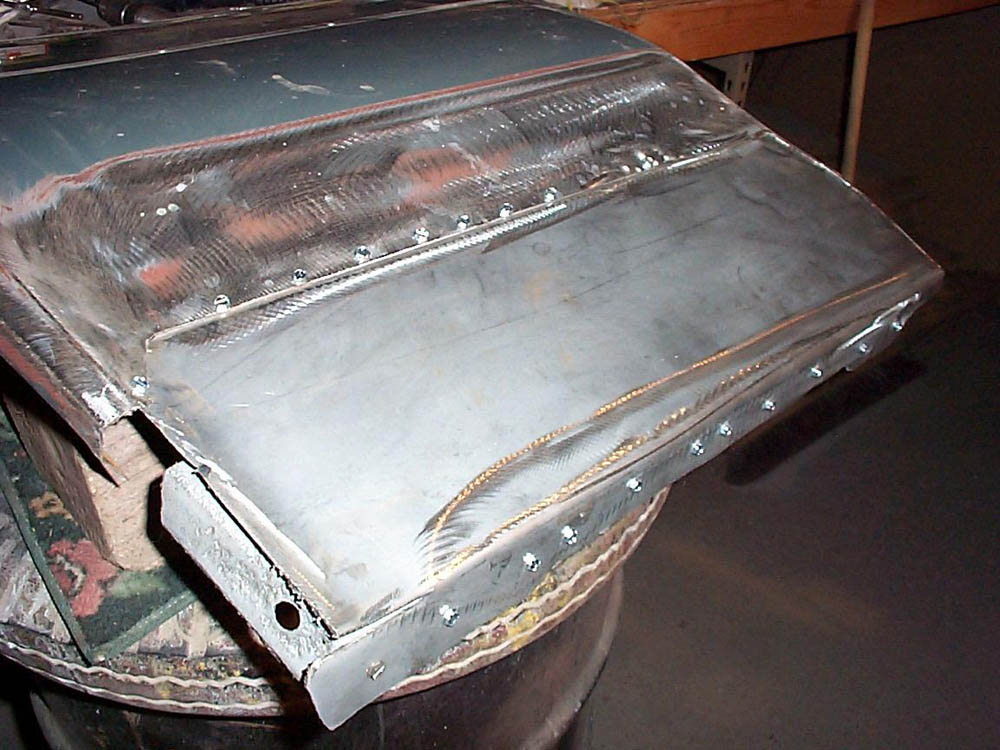
This photo shows the hand made patch for the right
fender. Metal was purchased at Lowes. Slightly thicker metal is used for
patch panels. This allows for a better weld with less distortion, and
thicker metal is easier to shape for contoured patch panels. A small metal
brake is used for bending and most contour work is done with gloved hands.
Repeatedly test fitting the patch until it fits into the opening like
a puzzle piece. Before final welding, the fender was test fitted to the
car, to be sure that the alignment was correct. On this Cadillac design,
the fenders are easy to remove as the hood hinges, and related inner structures
are not directly attached to the outer fender skin. |
 |
 |
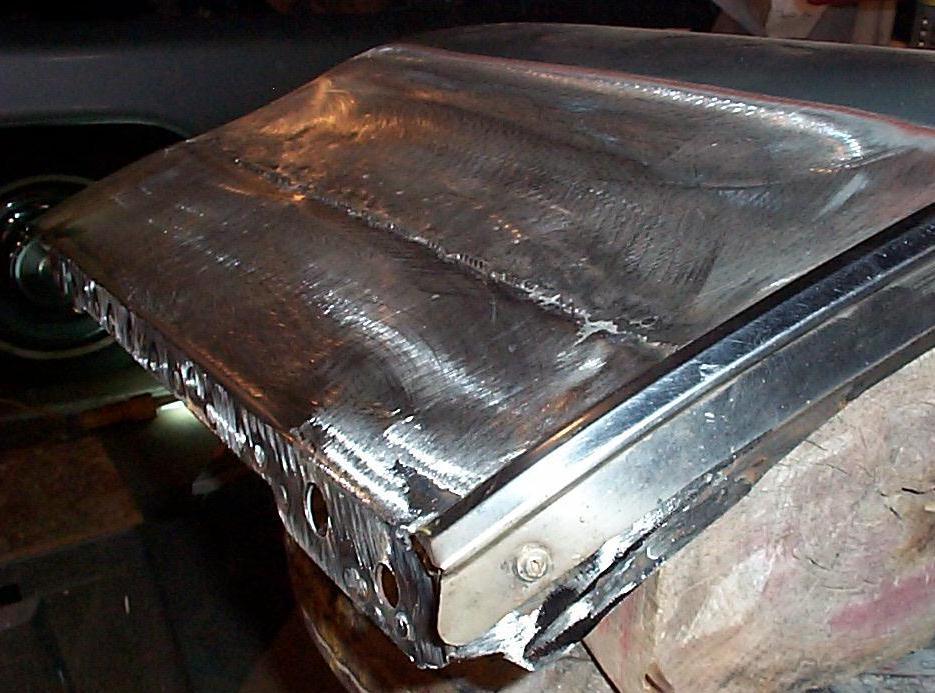
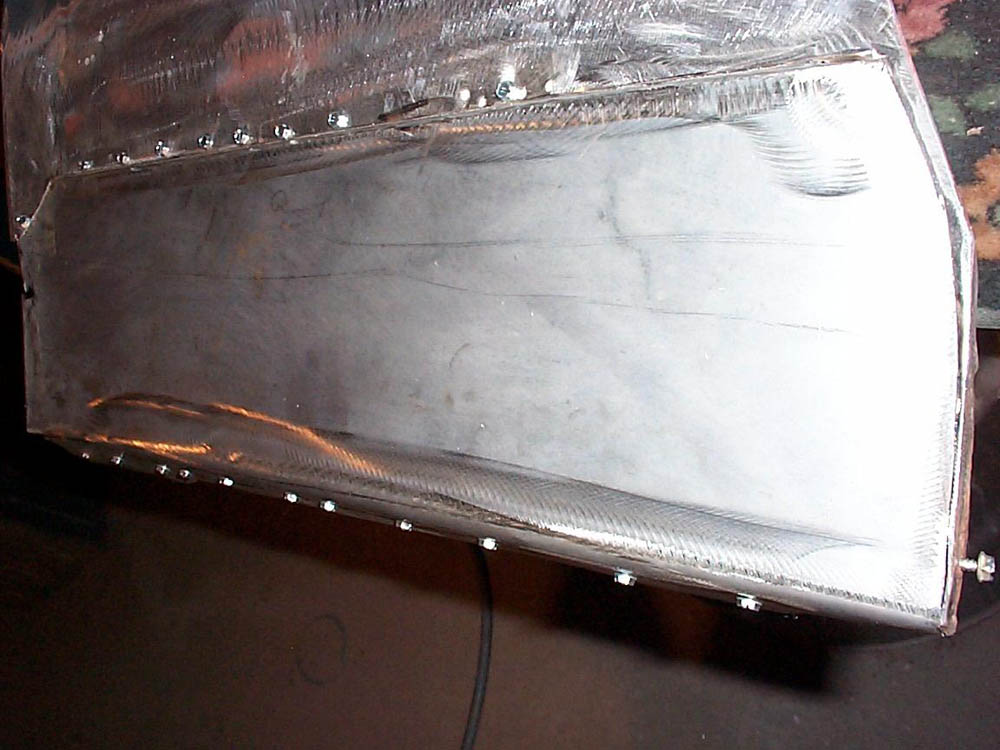
The patch after welding. Small holes were punched
into the lower edge then rosette welded to securely attach the patch panel
to the inner reinforcement. When ground down in the finishing stage, this
leaves a fair imitation of the factory spot welds. With careful craftsmanship,
the entire perimeter edge of the fender repair remained in steel. Size
0.23 wire was used in the MIG welder to minimize heat distortion. |
The wheel opening molding was test fitted to the fender
for proper alignment. |
 |
 |
To get the correct look in this area, separate small
patches were made and then welded into position. On this type of repair,
it is important to avoid thick application of plastic filler at the edges.
This way, attaching the moldings, and possible stone impacts from a tire,
will not chip away the filler. With careful craftsmanship, the entire
perimeter edge of the fender repair remained in steel. |
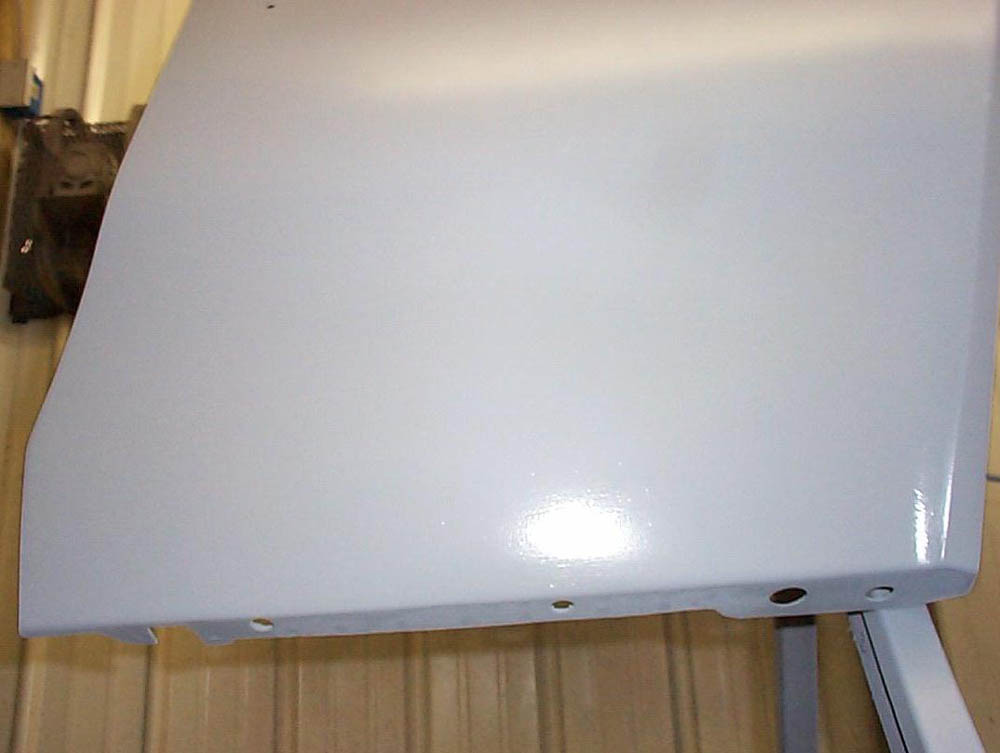
Urethane primer from Glasurit. NOTE: Since the early 1980s Jim has used ONLY URETHANE products. Why? Lacquer primer is thermoplastic. It essentially can be returned to a liquid state by simply adding thinner. It is made of resin and talc. The resins never completely dry. For this reason, over time this type of finish will shrink into the bodywork. The reason that sand-scratches and bodywork is often visible in finishes is because of this continuous shrinkage of the undercoats. |
 |
 |
Unlike lacquer and enamel paints, urethanes are not cured by evaporation, they use a hardener to permit a thermosetting chemical reaction. When dry, urethane finishes are incredibly stable for very long periods of time and have shrinkage levels so low they are almost impossible to quantify.. In addition, urethanes have a much higher build-rate and block sanding is much easier because less applications are necessary. |
The fenders were block sanded and re-primed, then block sanded again before installation. This made the work easier as the fenders were on a work bench and could be inspected more thoroughly. When you look closely at work done by Jim, there are no visible sand scratches anywhere. |
 |
 |
Bottom view of the right fender. By using only Urethane products Jim's cars have chemically identical finishes from the bare metal to the top of the finish coat. This method ensures proper bonding of the different steps in the refinishing process and results in a finish that holds it's gloss for decades without the need for polishing, or buffing. It is not necessary and pointless to feed wax and compound nutrients into urethane as it is so hard that it cannot absorb petrochemical compounds. |
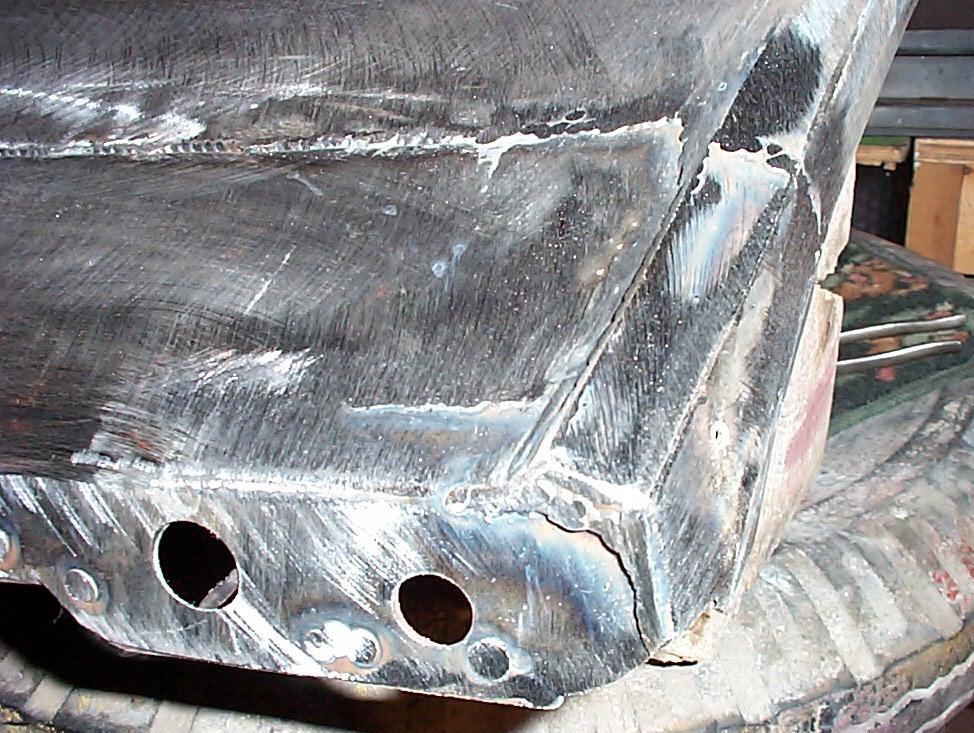
The left fender is bulging outward from the previous
repairs. Note the rust falling out from the backside of the patch. |
 |
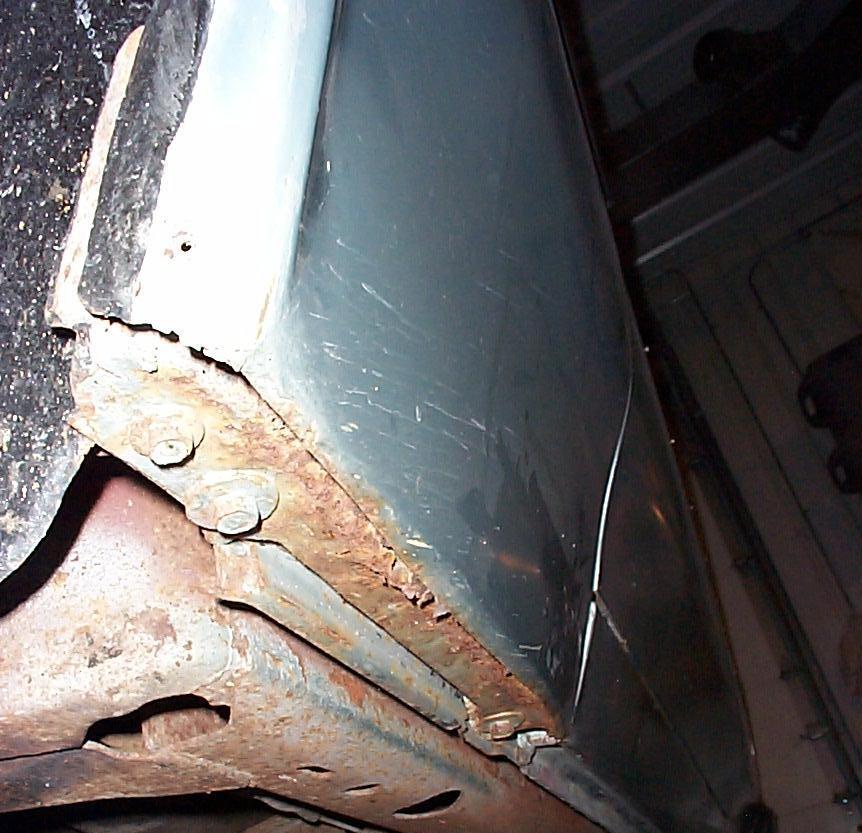 |
No effort was made by the previous repair person to
attach the patches to the bottom of the fenders. |
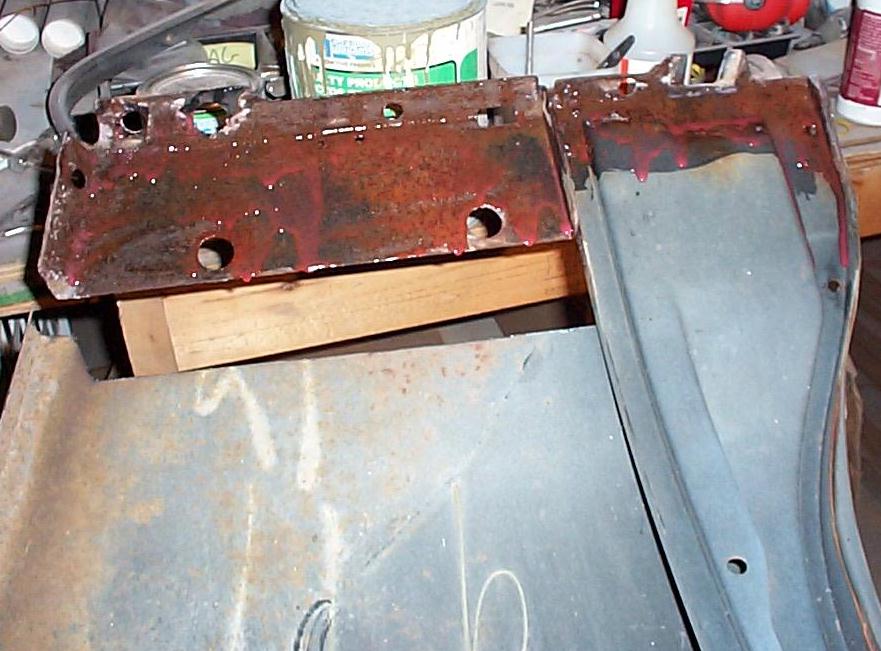
The inner areas were treated with naval jelly, and
patched as needed. Left side fender shown. |
 |
 |
|
Left fender patch in the installation stage. |
 |
 |
Final test fit of the patch before welding. |
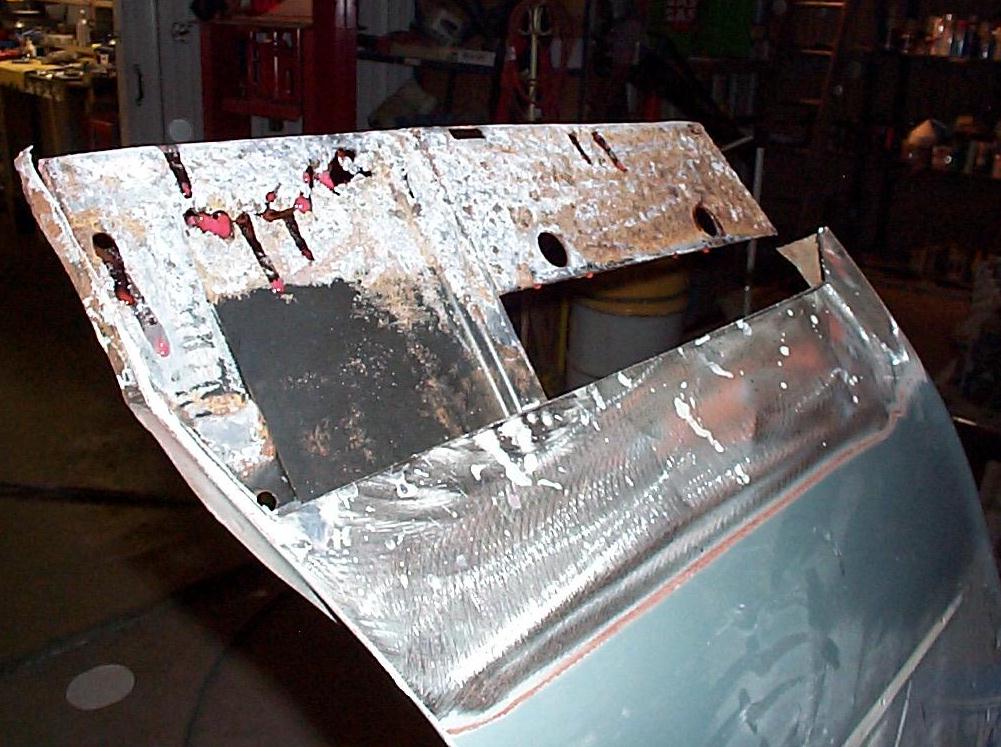
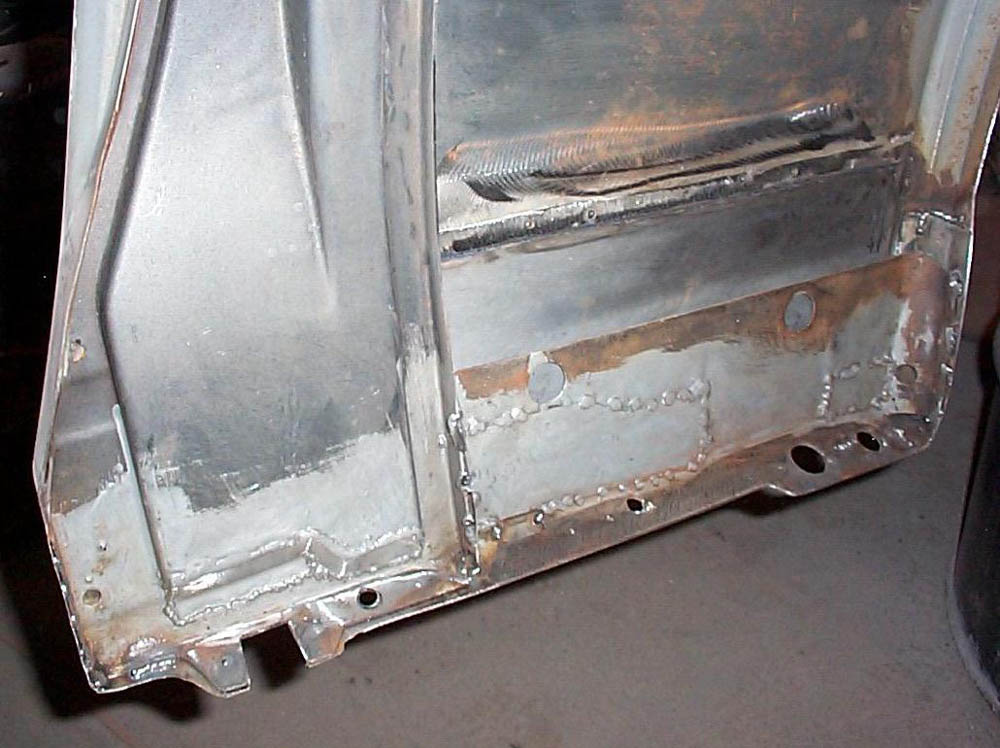
Interior view of the repairs made to the left fender
inner structure. All internal repair areas are treated inside and out
with special rust inhibiting paint. The top area of the inner reinforcement
was sealed with a urethane windshield sealant which directs the rain water
over the interior back side of the reinforcement panel. This way the water
cannot get between the two panels. Rubberized 3M spray undercoat was liberally
applied to the interior of each fender before final installation. |
 |
 |
Final working of the repair before primer. In this
photo the metal can be seen showing through the plastic filler. The patches
were carefully aligned and checked with a straight edge before welding.
This allows for a minimum thickness of filler. Careful attention is paid
at the edges of repair panels to minimize the plastic filler. This way,
real metal is on the edges to prevent the plastic from chipping away from
small pebble impacts from the tires. |
Glasurit urethane primer was used. The fenders were
block sanded and re-primed, then block sanded again before installation.
This made the work easier as the fenders were on a work bench and could
be inspected more thoroughly. |
 |
 |
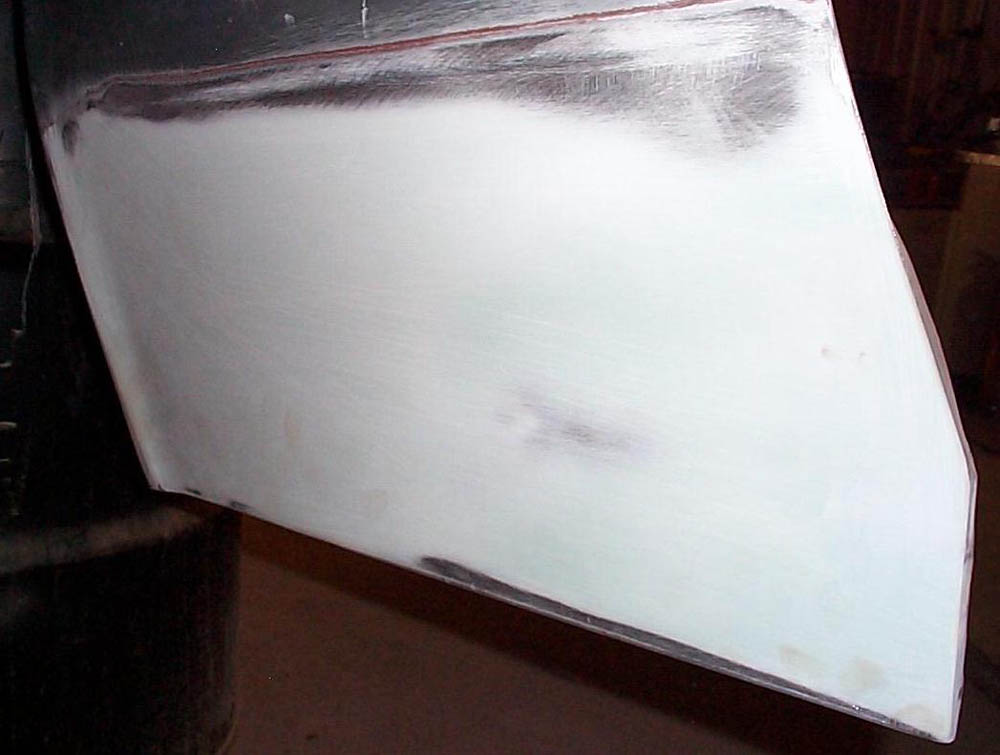
View of the left fender under. The lower areas were
"trim out" painted before installation. |
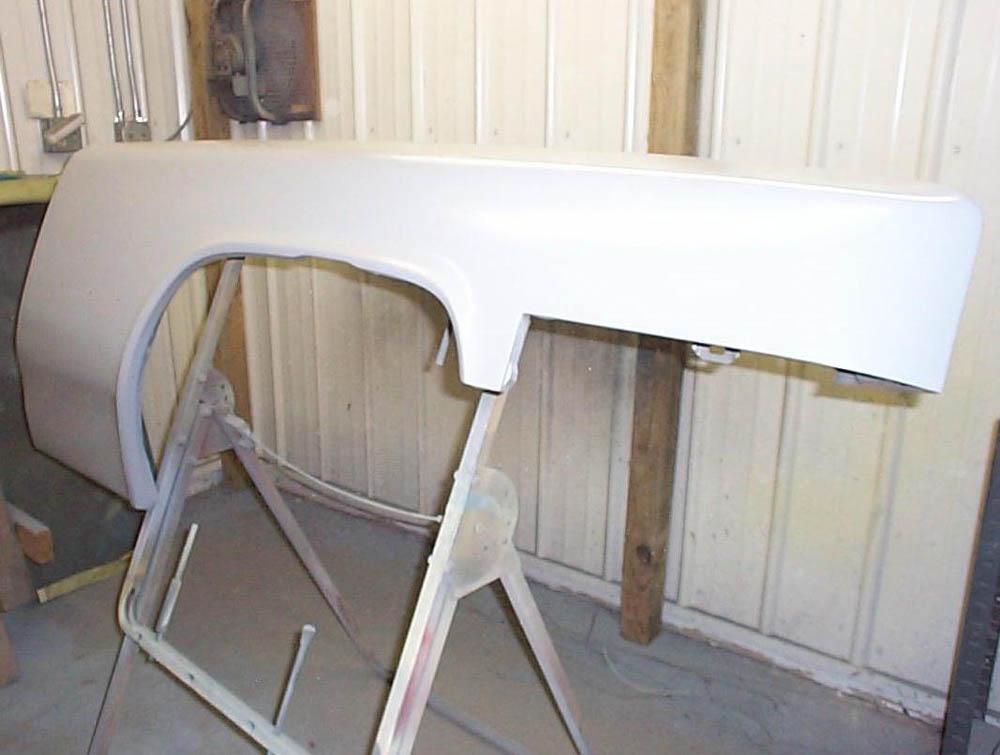
Ready to go to the paint shop. The car was painted
in RM Diamont Base coat, clear coat Urethane by the Main Street Body Shop
in Fowler Indiana. Custom color matched base coat paint supplied by Auto
Body Supply in Lafayette Indiana. |
 |
 |
Most trim was removed for the paint job. It was unnecessary
to remove the bumpers as they do not overlap the painted portion of the
body. The side moldings on the fenders use cast mounting studs with speed
nuts. They are not accessible with the fenders on the car. When the fenders
were off the car, these were removed, and the underside area was painted. |
 |
|
 |
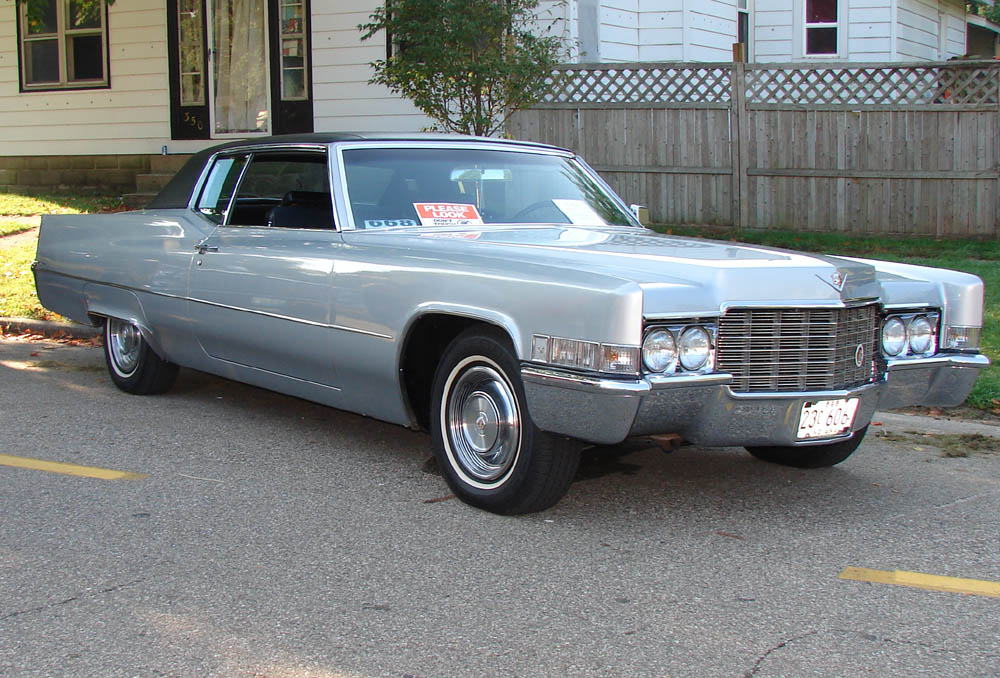
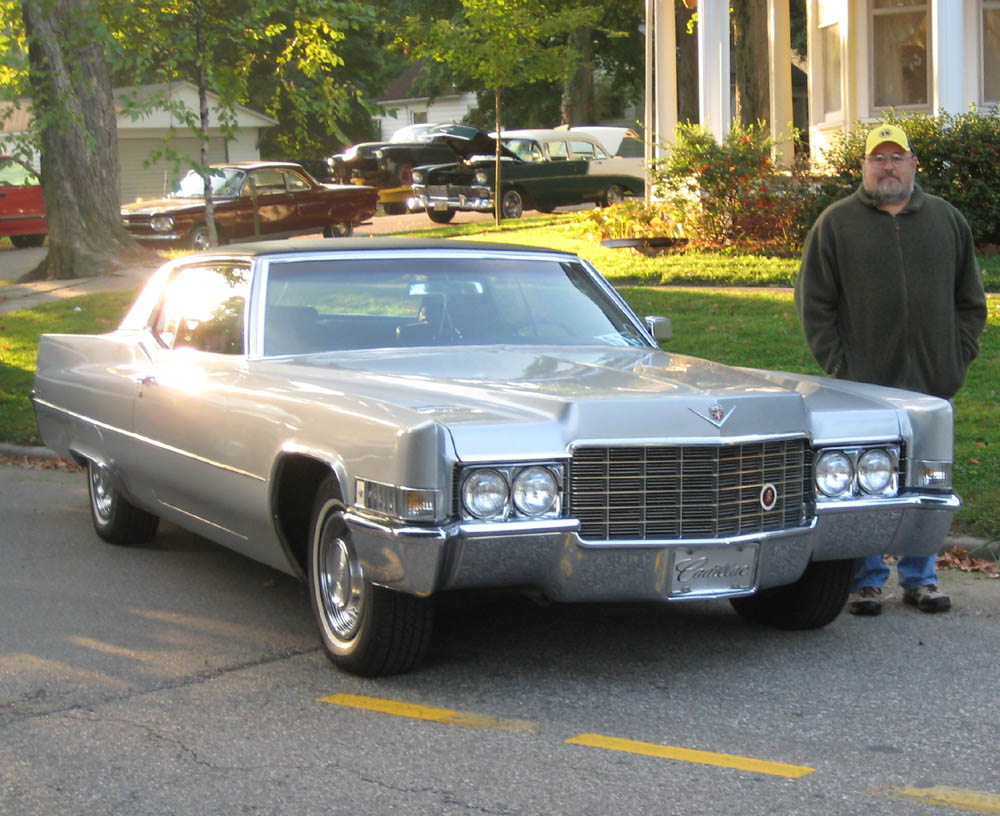
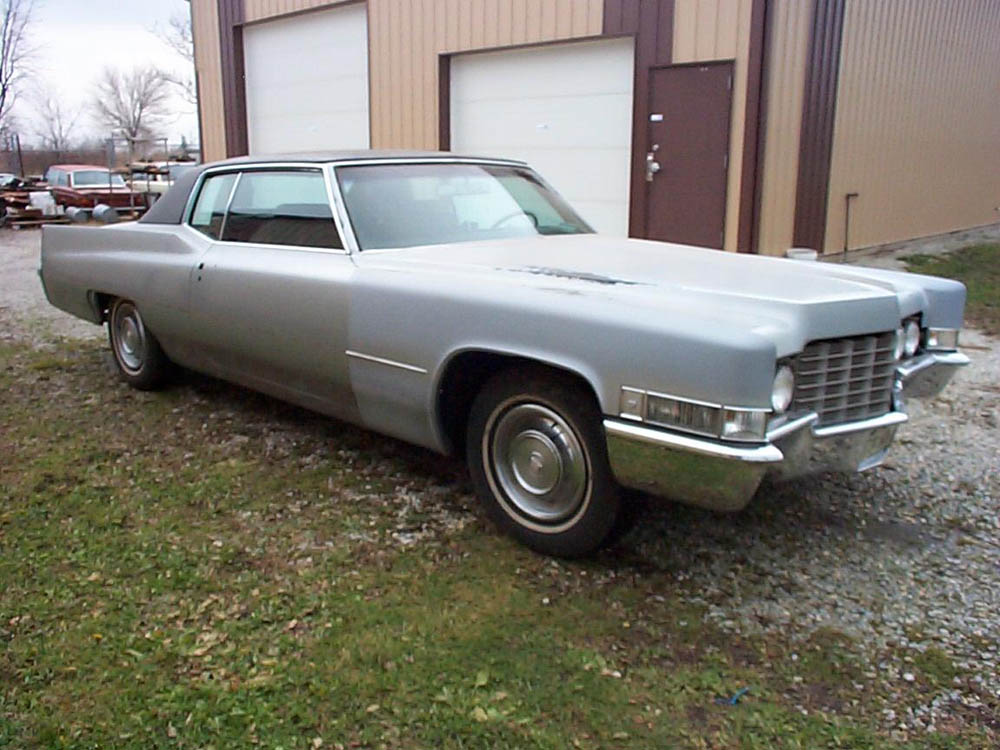
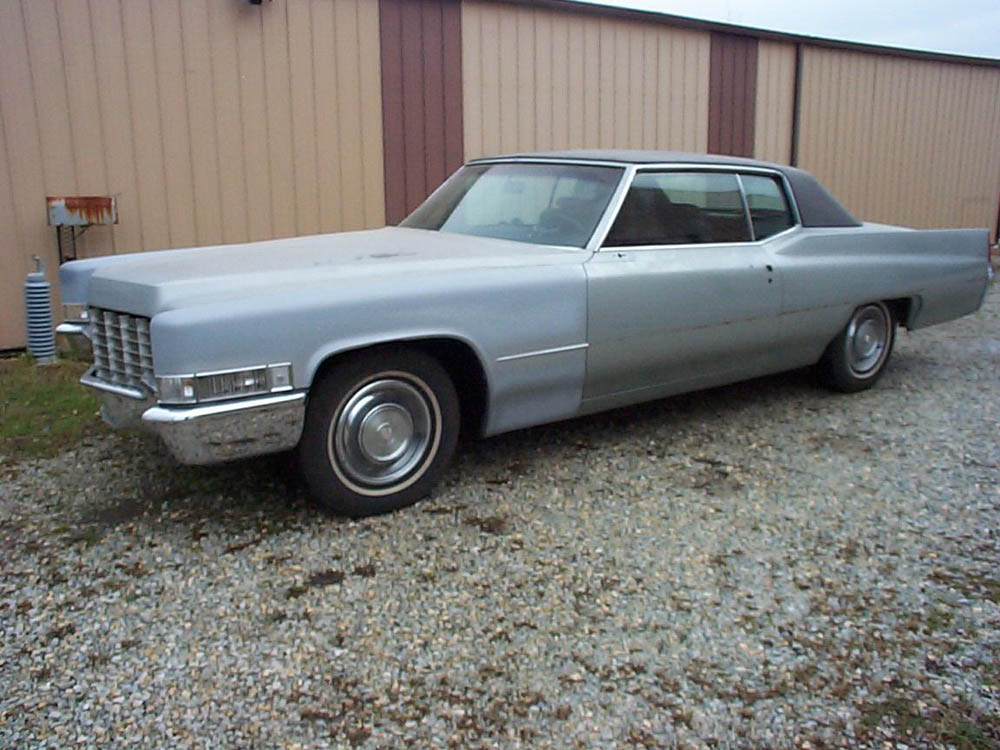
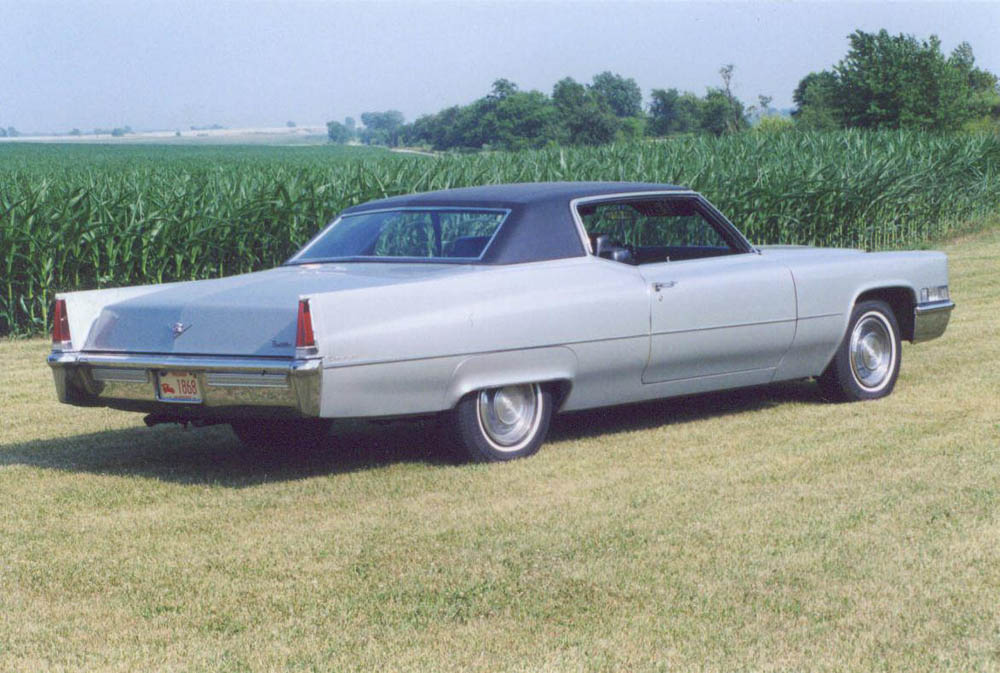
The finished product. Photo taken in June 2005. This car has never been in an accident,
no dings or dents of any kind, and with
the exception of the front fender repairs, had no rust or body filler. All chrome and brightwork on the car is original and in near perfect condition. |
The vinyl top is the original, and in exceptional condition. The black cloth and leather interior is immaculate. The power antennae works perfect. The original climate control air conditioning system is intact and operational. There is no substitute for a low mileage car that has been garaged! Thank you: Marty Snell, Tim Snell, Mike Pavuk, John Boyce, Alex Miller, The Autotorium, Main Street Body Shop, Fowler NAPA, Auto Body Supply, Dubber's Alignment, The Cadillac & LaSalle Club, and EBAY! |
|
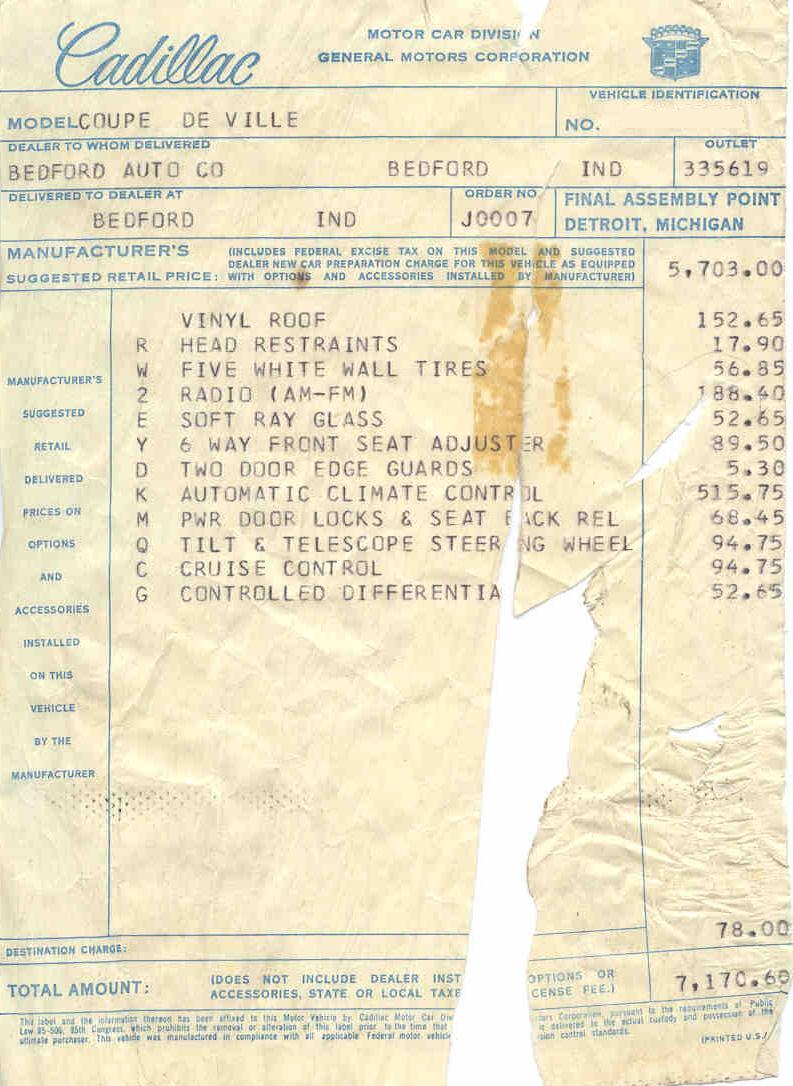 |
The Original window sticker for Jim's car. $7,170.60 Click image to enlarge |
NOTES for persons who are thinking of buying a 1969 or 1970 Cadillac DeVille As I show in this web page, the best way to seal the fenders is to take them off and treat them with super-rust inhibitors after properly repairing them. Then keeping this area clean of debris by washing it with water occasionally. At least you can clearly see down in there from the under hood area with a flashlight.
I have never seen one that did not have rust issues there. In fact, when I was working at the Chevrolet dealership in 1977 I repaired extensive rust on both front fenders of a 1970 DeVille Convertible that had very low miles. I have heard that even cars from California will be rusted there just from rain water and debris accumulation. I have also never seen rust repairs done to the extent that I did to mine. People simply will not remove the fenders which I think is the only way to do this properly. Even though they actually are relatively easy to remove due to the design of the car as I show on this web page. For sure, if you use a magnet, you will probably find plastic filler on the lower fender heels. As the 1969 and 1970 use the same fenders, at the time I repaired my car in 2005, I found it odd than nobody was making patch panels for this area. But at least this is relatively flat and as I show, they can be made without too much difficulty.
The only things that gave me problems on my car were:
The transmission. I had it rebuilt simply because it had sat for more than ten years before I bought the car and there were seals and parts that had dried out. It leaked oil and shifted hard under acceleration.
I also had to replace all of the rubber bushings in the front suspension due to dry rot. once I started to drive the car they began to fall apart immediately. It is very hard to compress those front springs, otherwise an easy job and not real expensive. My car had no problems with the ball-joints or tie-rod ends. Just the rubbers were shot. Be sure to get it aligned afterwards.
The exhaust heat riser valve on the right manifold was frozen in place and leaked like crazy. I found two of them NOS in a shop in Indy and bought them both. This cured the annoying puffing sound from the exhaust manifold and cured the warm-up choke release problem.
I had the carburetor rebuilt as this was also leaking and running rich. (Make sure to fix the common center body fuel seepage leak with epoxy. Any Quadra-Jet expert knows how to do this)
I also had problems with the posi-trac. It would grumble and vibrate loudly with lots of shuddering and banging during low speed tight turns. Especially in reverse when parking at car shows typically. (It was loud!) I finally changed the oil and added the genuine GM posi-lube and recommended additives and then after a half hour of tight figure-eights in the high school parking lot, never had any more problems with it. There is not a drain plug on that differential so the old oil must be sucked-out with a big syringe made for that purpose. Who knows why they did that? I had never before seen a rear differential that had no drain plug. (Find this info via Google. Just search GM posi-trac noise)
My A/C was low on freon but just a little. I am hoarding one pound cans of the real R-12 and one can fixed it for the whole time I had the car. I have read and been told that these climate control systems will not work properly with conversion to R-134. Something about the density of the newer gas being very different and the climate control sensors and the type of compressor will not work with it...
The heater blower fan went out but these are GM standard and not expensive. I bought mine on ebay for $20.00. It was out of a Corvette.
On the 1969 models, the steering wheels are "rim-blow" horn and they all have bad plastic chrome on the rim area where the rim-blow horn is. If yours is nice, put a sewn-on leather wheel cover on there to protect it. Or that works to cover a bad one as well. The horn will still work by squeezing the rim as always. Some owners put the 1970 wheel on there as it has center blow and not that crummy plastic chrome. At a car show, only a 1969 Caddy experts will know you have the wrong wheel. I thought I would find a NOS 1969 one. After years of looking only one came up on ebay and it sold for more than $1000.00 !
Check your distributor vacuum advance valve. (The silver thing on the side of the distributor with the vacuum hose plugged into it) They are almost always bad due to dry rot of the diaphragm inside. They are inexpensive and your engine will run a lot better. Check it by pulling a vacuum on it with a hand held pump and see if it holds that vacuum. It probably won't for more than ten seconds or not at all... :)
|
|
TANKLESS WATER HEATERS ARE RAPIDLY CHANGING THE WAY AMERICANS HEAT WATER. YOU TOO CAN SAVE ENERGY AND MONEY.
|
|
